Installing ArchLinux as a VirtualBox guest system
Installing ArchLinux on a VirtualBox Machine
Preparation
You will need about 20-30 minutes of your precious time to follow through will all of this. That assumes everything will go smoothly (why wouldn’t it?).
First things first – obtain the Arch Linux installation media in form of an ISO volume from https://www.archlinux.org/download/.
Assuming you have VirtualBox already installed, create a new VM. ArchLinux is one of the recognized machine types in the VM creator form, so use it. Allocate some of your host machine resources to the machine, adjust accordingly to your rig’s capabilities.
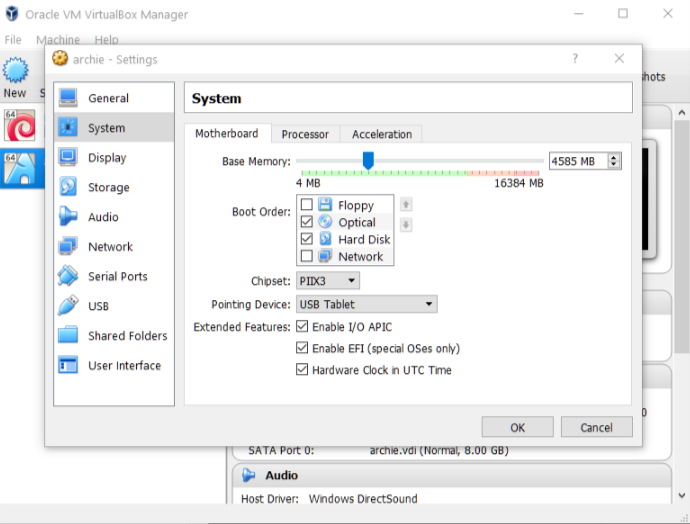
One thing I’m going to do, that might not be strictly necessary is to enable EFI under “System” settings (this is related to bootloader configuration described later in this article):
One last this to remember – if you enable input capturing inside VirtualBox window, remember you host key. On Windows it’ll be the right “Ctrl” key, on MacOs the right “Cmd”. Another useful thing: “Ctrl+Home” will open Vbox machine pop-up allowing you to do things like reboot and ejecting virtual devices (e.g. ArchLinux installation ISO image).
Now it’s time to follow ArchLinux installation guide to the letter.
Partitioning
I’ve went with a dynamically allocated 8gb storage volume for my virtual hard drive. I’ve also decided to go with GPT/EFI partitions.
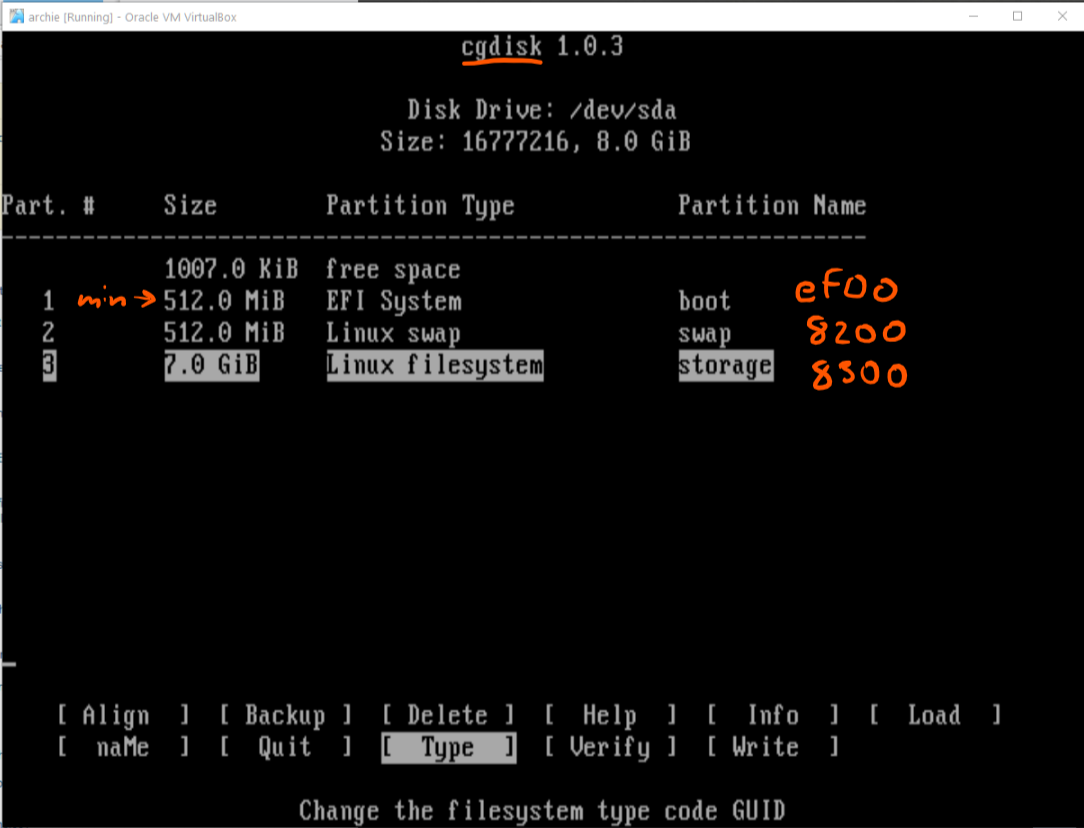
According to most of the guides I could find, the suggested layout would look as follows:
/bootpartition, 512 MiB in size at the begging- swap partition, min. 512 MiB in size
/partition using the remainder of the drive
To make this happen we can use a multitude of tools: gdisk, fdisk, cfdisk. Here is an example using gdisk.
# gdisk /dev/sda
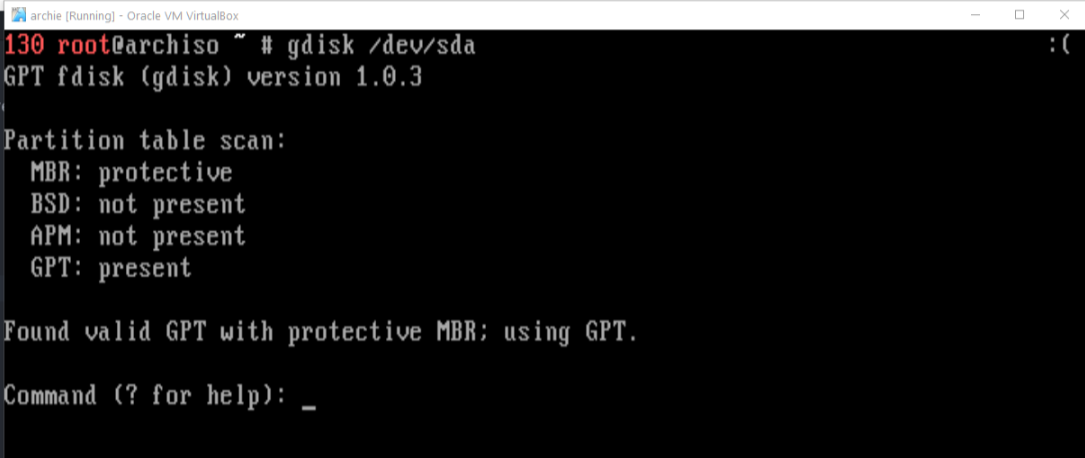
Running that will start a partition scan to assess the current state of drive’s partitioning.
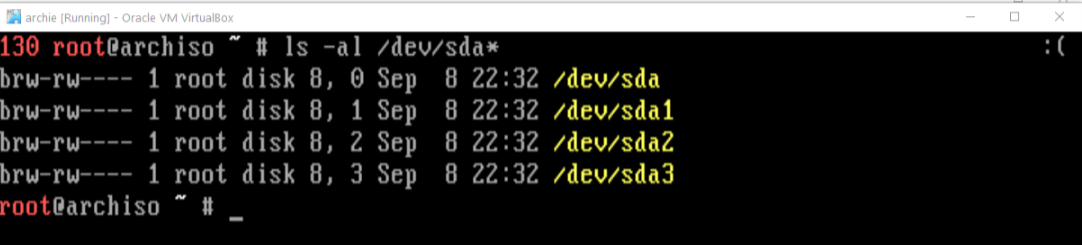
If you went through some trial and error when creating partitions, gdisk will kindly suggest to reboot (something cfdisk failed to do for me). Do so if necessary. In the end you should end up with:
Formatting
Assuming the layout created above:
mkfs.fat -F32 /dev/sda1
mkswap /dev/sda2
mkfs.ext4 /dev/sda3
Mount the partitions
# mount /dev/sda3 /mnt
# mkdir /mnt/boot
# mount /dev/sda1 /mnt/boot
# swapon /dev/sda2 # this should not be necessary because of genfstab
Boostrap root partition
Time to install the basics:
# pacstrap /mnt base
This will install the basic set of packages required to log in to the system.
To inform the newly bootstrap system of all the partitions we’re going to use and have them mounted on boot:
# genfstab -U /mnt >> /mnt/etc/fstab
This will generate a fstab file, referencing drives by their UUID (as an alternative to referencing them by their labels).
Logging-in
Now we can finally log in to the system with:
# arch-chroot /mnt
Well, technically changing root is not the same as logging in, more like, well changing root directory to a specified folder…
Basic configuration
Time and localization options:
Uncomment en_US.UTF-8 UTF-8 and others needed in /etc/locale.gen and run:
# locale-gen
Then:
# echo "LANG=en_US.UTF-8" > /etc/locale.conf
Time:
# ln -sf /usr/share/zoneinfo/Europe/<City> /etc/localtime
Set hostname:
# echo vbox > /etc/hostname
I’ve used vbox, but you can use whatever. But whatever you use, remember it for this:
# echo -e "\n127.0.1.1\tvbox.localdomain\tvbox" >> /etc/hosts
-e flag will make echo interpret escape character like \t and help to keep /etc/hostnames file consistently formatted.
Networking:
# systemctl enable dhcpcd
for a wired connection. It’s possible to set-up wireless, but I’ll not cover this, because for a VBox install it does not seem practical.
XOrg and ALSA for audio-video capabilities:
# pacman -S xf86-video-intel xf86-video-fbdev xorg-server xorg-xinit xorg-twm xterm alsa-utils pulseaudio pulseaudio-alsa
VirtualBox guest additions:
# pacman -S virtualbox-guest-utils virtualbox-guest-modules-arch
This will allows us to change screen resolution and a couple of other useful things. More about guest additions and what can they do.
A window manager (I chose XFCE4 as a compromise between nice to use and light on resources):
# pacman -S xfce4 xfce4-goodies # the latter is optional
Various stuff you might need:
# pacman -S vim zsh rsync firefox sudo python python-pip nodejs git openssh
Set up password for the root user (interactive command):
# passwd
Add a non-root user:
# useradd -m -g users -G adm,lp,wheel,power,audio,video -s /bin/zsh me
# passwd me
# EDITOR=vim visudo  # uncomment %wheel
where “me” is you (or whatever login you want to use). wheel is a sudoers group, why it’s called like that, I do not know.
That should be enough to get started. So now:
exit
umount /mnt -R # -R because of /boot partition mounted in /mnt/boot
reboot
Installing the bootloader
Arch guide lists this step near the end, but I decided to make it the first one, since this has been the most troublesome and confusing. Back in the day you would just install to MBR and things would be dandy:
# pacman -S grub
# grub-install /dev/sda
However this new madness of (U)EFI firmware came about and now it’s more like:
# pacman -S grub efibootmgr
# grub-install --target=x86_64-efi --efi-directory=/boot --bootloader-id=grub
Which should output something like this at the end:
Installation finished. No errors reported.
Then we can generate GRUB’s config file:
# grub-mkconfig -o /boot/grub/grub.cfg
If that goes well, we’re set.
First actual log-in
I’d recommend to login as the non-root users we created to test if that works correctly. If yes I’d also suggest to run:
# sudo pacman -Syu
Set-up time synchronisation service:
# timedatectl set-ntp true
to test that sudo was configured properly and update the system at the same time.
Pacman is the official package manager and it is great. However there is tons of non-official packages for you to explore. One of the ways to get to them is to install yaourt. There are others, but I have been using that one for a while and so far it gave me little issues. If you want it start with:
# pacman -S base-devel
to install extra base packages necessary to make and install pacman packages from scratch (among other things). Then follow the instructions on the yaourt homepage (as a non-root user):
# git clone https://aur.archlinux.org/package-query.git
# cd package-query
# makepkg -si
# cd ..
# git clone https://aur.archlinux.org/yaourt.git
# cd yaourt
# makepkg -si
This will install yaourt and its dependency package-query.
Afterwards, we can try the window manager:
# startxfce4
If that fails (I keep forgetting why…), you might need to install a display manager. E.g. to install LightDM:
# pacman -S lightdm lightdm-gtk-greeter
and then:
# sudo lightdm
you can also make it start on-boot using systemd service:
# systemctl enable lightdm.service
Prosper
All is now set, ready to use and further customizations. Enjoy!
Extra references
- StackXxchange :: Preparing /boot partition for EFI
- Github :: A bit outdated, but still useful installation cheatsheet
- Arch Wiki :: Installation Guide
- Arch Wiki :: EFI examples for GRUB configuration
- Arch Wiki :: Checking if GPT can be used
- Arch Wiki :: Installation steps for Arch Linux as VirtualBox guest machine
- Arch Wiki :: XOrg installation
- Arch Wiki :: GUID and partition tables
- Arch Wiki :: Timesync Systemd service
- AverageLinuxUser :: Making XFCE4 prettier